
Step by Step Guide to Install Oracle Database 19c on Windows
In this post I am going to share step by step for installing the Oracle 19c Standard Database on Windows Operating System.
1) Download the 19c Windows Database Software
I have downloaded Oracle Database 19c (19.3) for Microsoft Windows x64 (64-bit) as per my need.
2) Unzip and Launch Installation Wizard

3) Kick off the installer
Right click and setup and run as administrator.

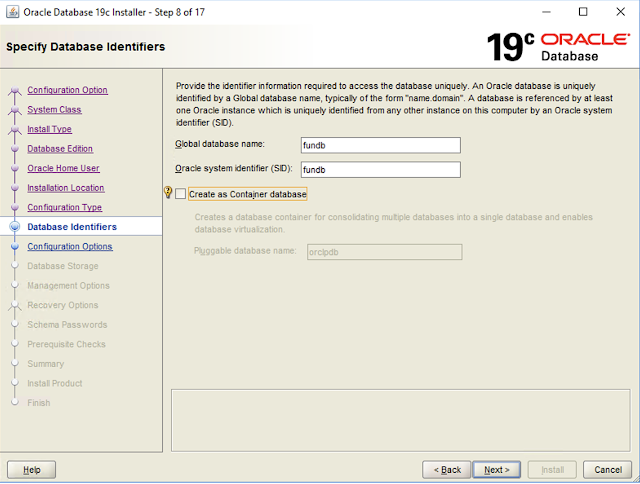
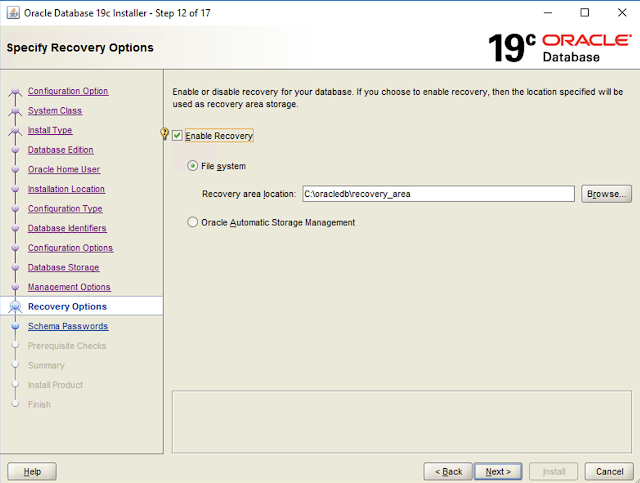
4) Follow the below screen to proceed with installation.

We are going to install and create the database.


I will use virtual account


Installation successful.

5) Connect sqlplus and validate the database.

6) Check Listener status

Post a Comment
Post a Comment